|
Adventures of a Transplanted Gardener |
||||
A new bed... and standing stormwater
| ||||

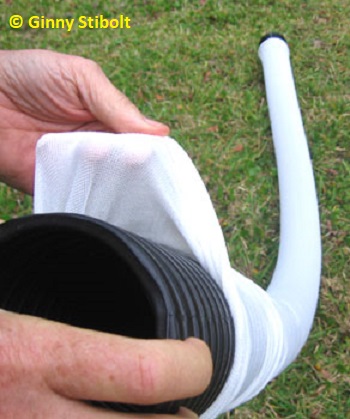 |
<< Covering a perforated pipe with a drainage sleeve keeps out the dirt and roots.
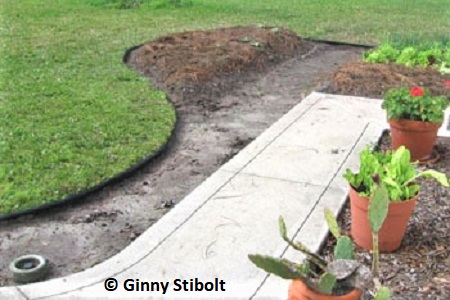
What do you do when stormwater stands in your landscape for days?
We decided to dig a four-foot by five-foot hole out and away from the end of the path; this would avoid all the underground pipes. My husband dug a hole that was four feet deep to see if he could get through the layer of clay for the best drainage. He didn't find a sandy layer and the deeper he went, the soggier the clay. Within a few hours water seeped back in and filled into the hole. We bailed out the water, but it seeped back in until the hole was half full. It rained another quarter inch and the water did not collect on the path but went into the hole. So until the water table sank below the bottom of the hole, we were at a standstill on this project. After more than two weeks without any rain, the water receded until it was just mucky clay in the bottom of the hole. The chances for more rain increased, so we made our move.
 |
Our goal, given the clay soil, was to create enough open area, so the water draining from the path would have a place to collect until it slowly seeps into the surrounding soil. We bought four ten-foot sections of perforated pipe and their corresponding sleeves at Home Depot. We thought that this would provide the enough volume to drain the path. Like a French drain, the cloth wrapping keeps the soil and most roots from entering the pipe.
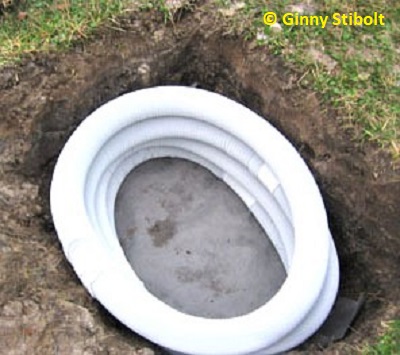
We covered the bottom of the hole with heavy-duty non-woven weed barrier cloth. We pulled on the sleeves (See photo above.) and attached the ends of the pipes together. We stacked the four circles of pipe in the hole.
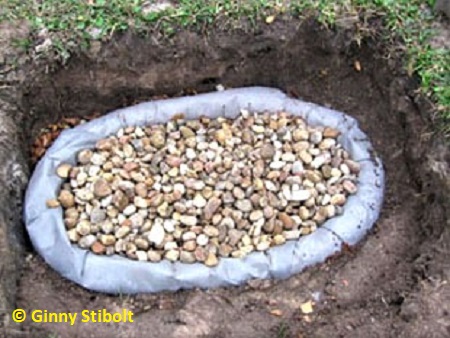 |
We slid more weed barrier cloth around the outside of the pipes down to the bottom of the hole and up and over the top pipe to keep out the dirt. Then we filled the area outside of the pipes with sandy soil to to evenly shape the drainpipe chamber from top to bottom. We then filled inside the pipes with washed river rocks. The rocks were clean with little dirt or other organic material. The spaces between the rocks will also provide places for water to flow. We laid two layers of weed barrier cloth on top of the rocks and pipes. Since we had more rocks,* we used the rest on top of the weed barrier cloth and then filled with sandy soil up to within four inches of the surface.
We let it settle for a few days then we filled in and leveled where necessary. Last, we replaced the sod on top of most of the area, but we extended the pathway over the front edge of the hole so rainwater can roll right in. The end result of all this work is a high-capacity drywell.
Note: You may also find that a high capcity dry well like this could be used for overflow drainage for a rain garden with a large amount of water to absorb or one that is located in a heavy clay soil.
Gardening projects
This is an example of a project turning out to be bigger (and more expensive) than it originally appeared, but then that's why gardening is an adventure. You just never know what's in store.
*The previous owner had used the river rocks around the swing area near the front pond. These rocks used as a mulch, were a real pain to maintain there under the shade of a red bay and several water oak trees. Leaves fall all the time and weeds grew through the old rotting weed barrier cloth. We replaced the rocks with our chipped wood mulch and circular stepping-stones over 30-year weed barrier. Now the area looks good because the leaves just blend in with the mulch and the high quality weed barrier keeps big weeds at bay. We didn't know how we were going to use these rocks, but they've been sitting in a pile on the edge of the driveway near the rain barrels for more than a year. Now weve put them to good use, and its nice to have that area of pavement clear again. There is still a smaller pile of red lava rockwe'll find a similar use for that one of these days. Gardeners are always stockpiling.
Ginny Stibolt is a life-long gardener, a botanist, a naturalist, and a garden writer. You may contact her or read more of her articles posted on her website: www.greengardeningmatters.com.
Copyright Ginny Stibolt