|
Adventures of a Transplanted Gardener |
||||||||||||||
Rain barrel diverter details
|
||||||||||||||


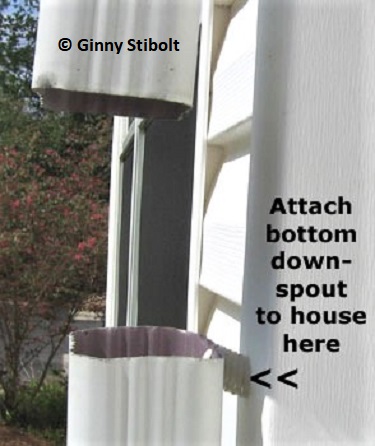 |
1) Cut a gap in the downspout that is an inch or two shorter than the
height of the catch basin. The catch basin will rest on the bottom
part of the downspout, so you'll need to support the bottom
section of the downspout by fastening it to the building.
2) We used 2.5-inch diameter PVC coupling for the overflow pipe. The
coupling consists of an inner sleeve is a bushing and outer sleeve is
an unthreaded straight-through union fitting. The two pieces connect
at the bottom of the catch basin. Cut a hole in the bottom of the catch
basin to be a tight fit for the inner sleeve. Also use a 1/16-inch
drill bit to drill two weep holes so when the rain stops the extra water
can slowly drip out when the barrel is full.
3) We used a series of 3/4-inch PVC pipes and elbows for diverting rainwater
to the barrel. At the bottom of one side of the catch basin, we cut
a hole to match the 3/4-inch pipe. Again, you will need a bushing on
the inside of the catch basin so the pipe doesn't slip out.
 |
 |
|
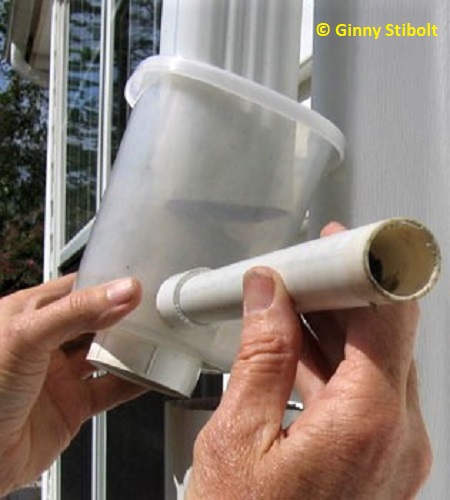
All of the pieces laid out in order. All these parts are held together with friction. This way they can be disassembled for cleaning and to outfit a new catch basin when the plastic becomes brittle. |
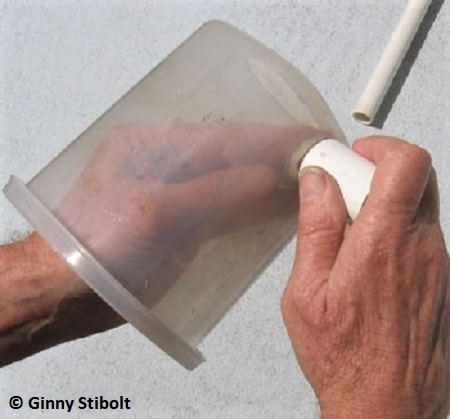
Insert the 3/4-inch bushing and straight-through union fitting on the side of the catch basin first. |
 |
|
|
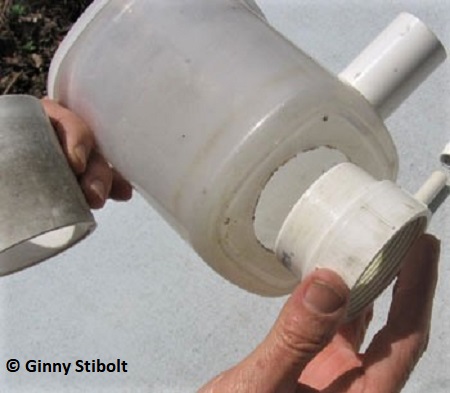
The inner and outer sleeve of the 2.5-inch coupling meet at the bottom of the catch basin. (Above, the bushing which serves as the inner sleeve is being inserted. The straight-through union fitting is held in his left hand.) Cut the hole in the bottom of the catch basin with a jig saw so that it is slightly smaller than the inner sleeve of the bushing. Use sandpaper to size the hole so there is enough friction to hold the pipe in place. (Otherwise it will fall into the downspout during the first heavy rain.) |
Tip the diverter in place. The bushing extending from the bottom of the catch basin keeps it from sliding off the downspout. |
|
|
 |
|
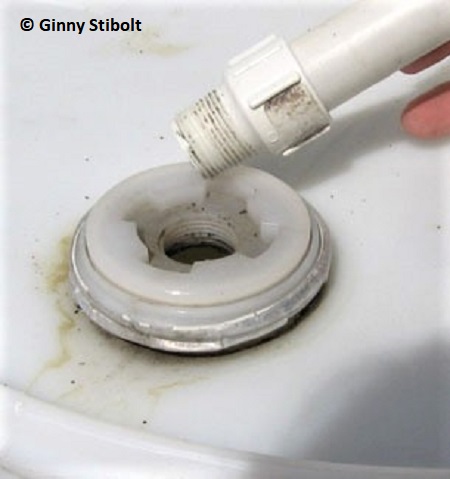
The threaded fitting is standard for the industrial barrels--it's used for a pump. The standard 3/4-inch threaded plumbing fixture fits perfectly. |
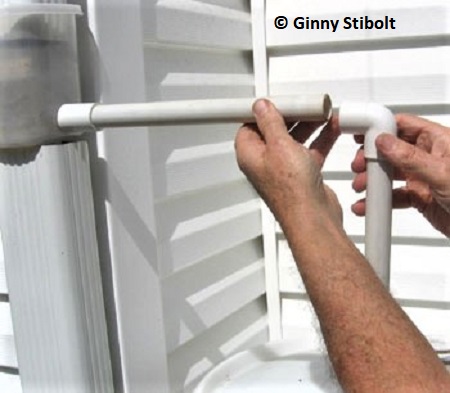
The last step is to insert the horizontal pipe from the diverter to the elbow. |
|
|
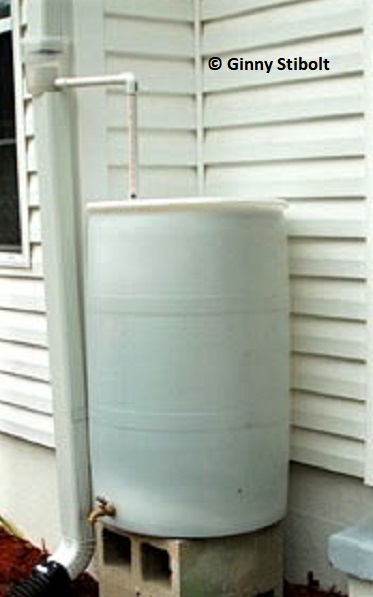
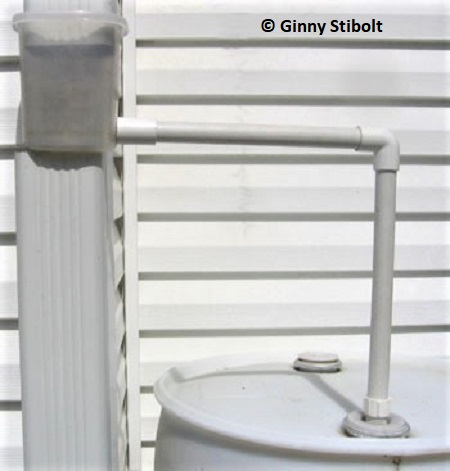
Here are all the pieces are in place. There are no vents in the barrel so as the water flows in there will be gurgling as the air comes out of the barrel. When the barrel fills up, the water rises in the pipes and into the catch basin. The water level rises above the through pipe in the center and overflows into the downspout. The weep holes in the bottom of the catch basin allow the water to slowly drip out once the rain stops so you don't attract mosquitoes. This detailed description is of our system. Your situation may require a different arrangement and different fittings. |
Back to the Rain barrels revisited article.
Ginny Stibolt is a life-long gardener, a botanist, a naturalist, and a garden writer. You may contact her or read more of her articles posted on her website: www.greengardeningmatters.com.
Copyright Ginny Stibolt